 Bloomz
Attach a payment to a post
When you're writing a post — a field trip announcement, a club fee — attach a payment request right in the composer. The post announces it, and the fee reaches every family as a payment request in their own Payments area, without you sending a separate request.
Before you start
- Payments must be turned on for your school.
- Add payment is not available on scheduled or recurring posts, drafts, announcements, or polls — a scheduled post publishes later, but its payment would start collecting immediately.
- Depending on your school's settings, your request may need admin approval before families see it.
Step 1 — Start a post
Open the composer for your class as usual and write your post.
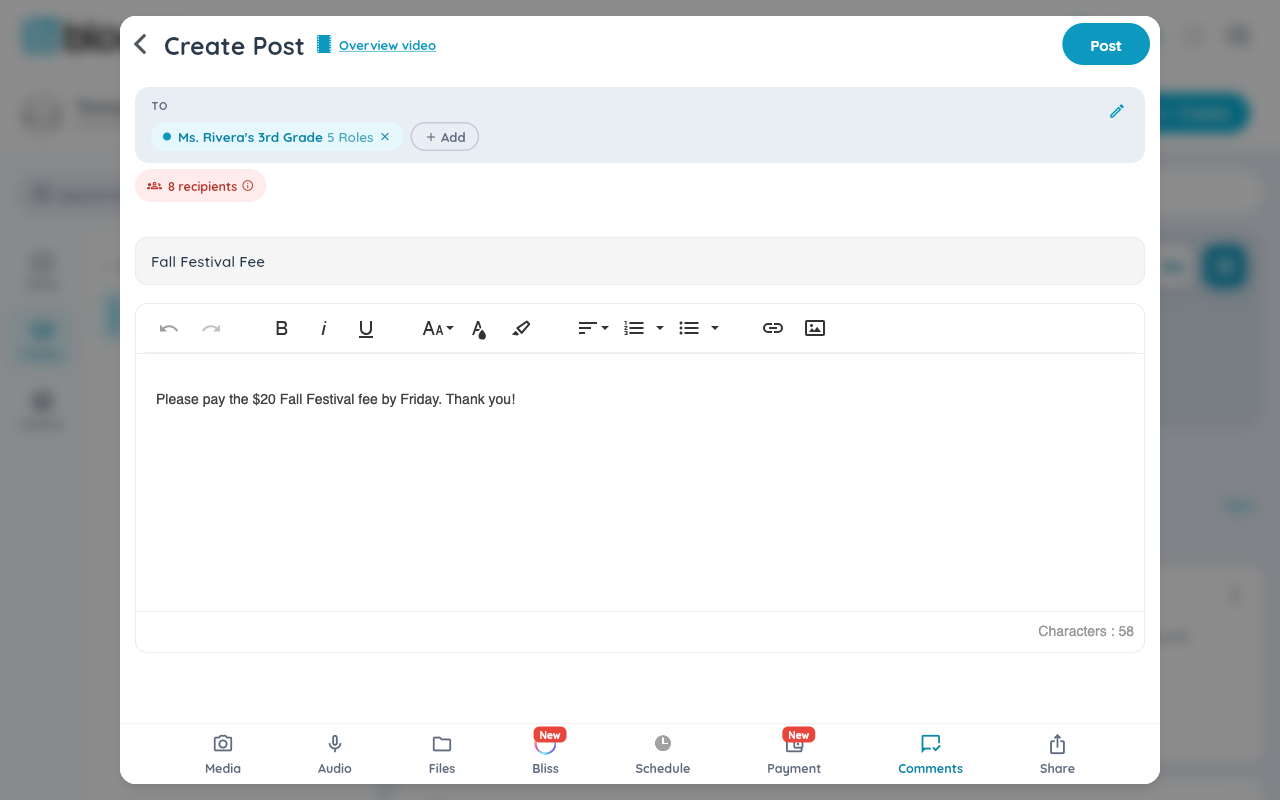
Step 2 — Choose Add payment
Select Add payment (the wallet icon) in the composer's bottom bar.
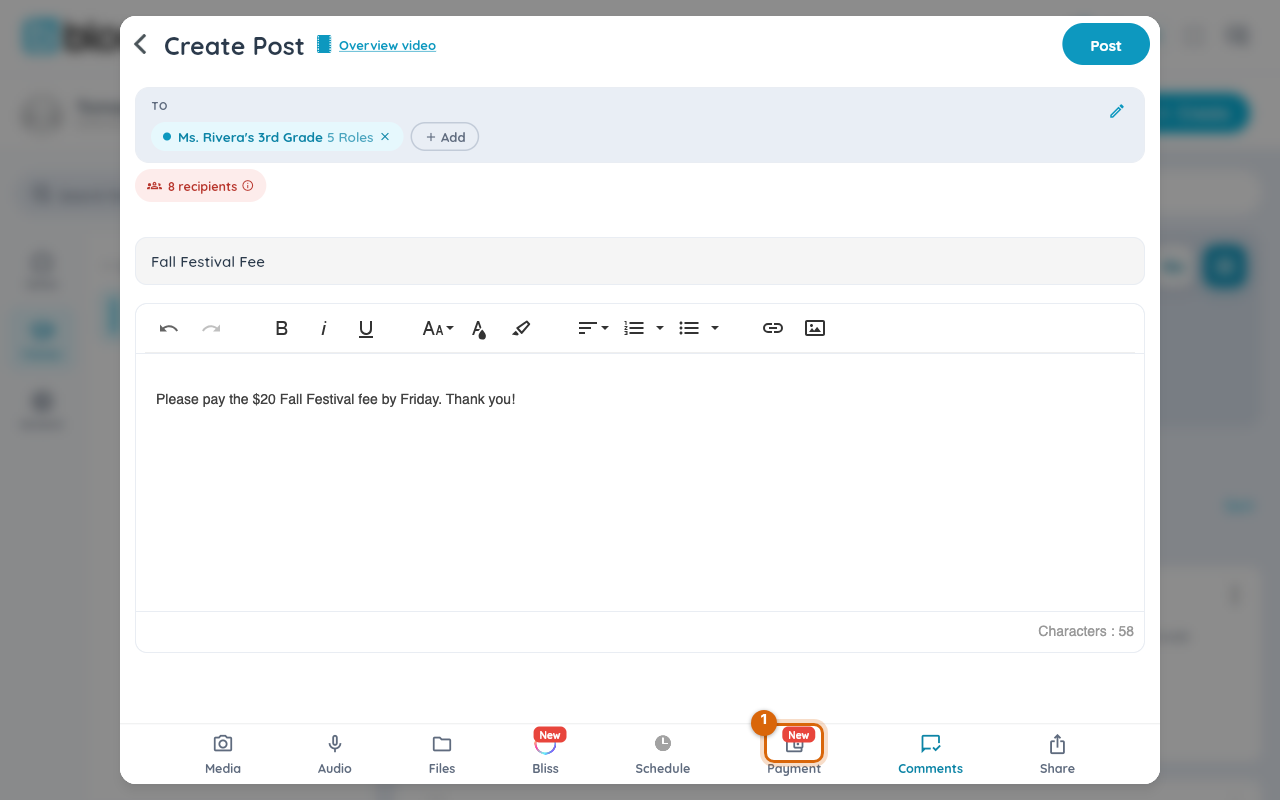
Step 3 — Fill in the payment details
Give it a title (it defaults to your post's title), set the per-student amount, and optionally a due date.
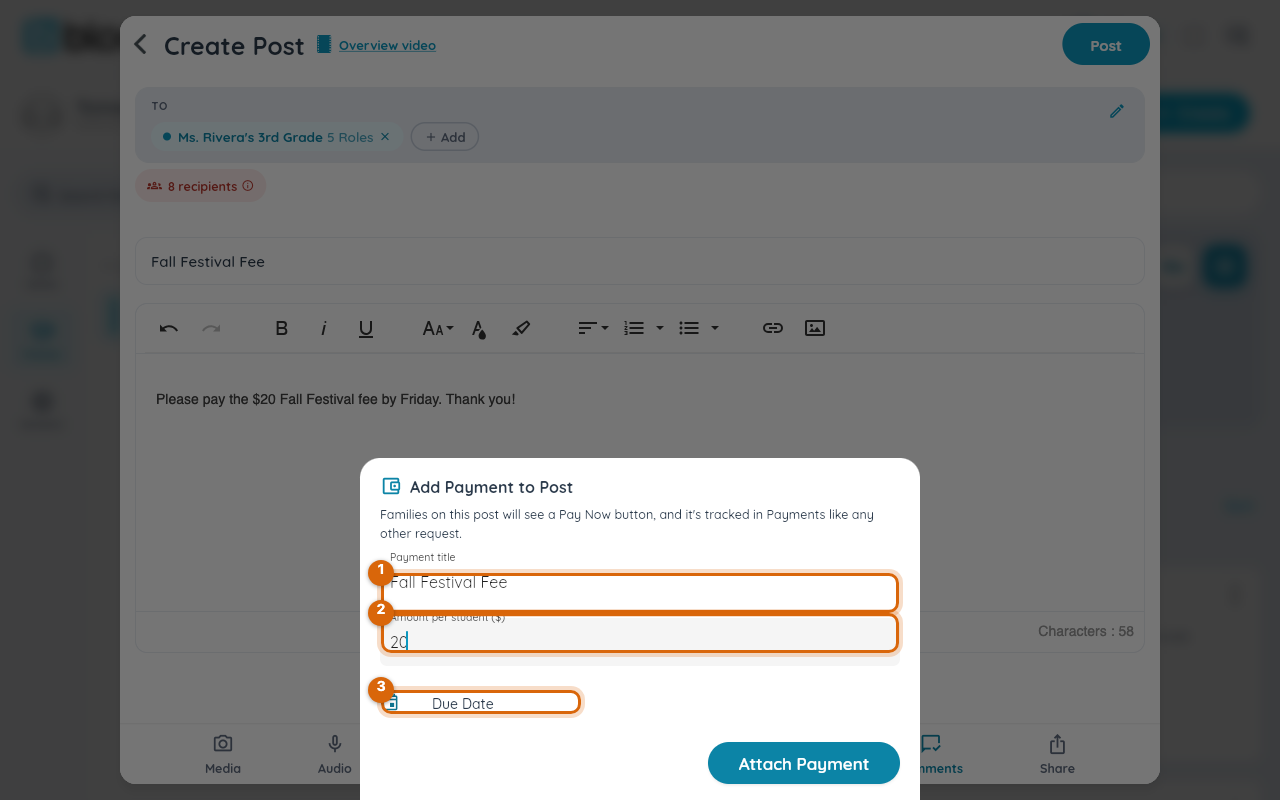
Watch out: an attached payment bills the group's full billable roster, not just whichever recipients you picked for the post. To bill only some students, create a payment request directly instead and choose those students.
Step 4 — Send the post
Send the post. Nothing is created until you do — backing out discards the staged payment too.
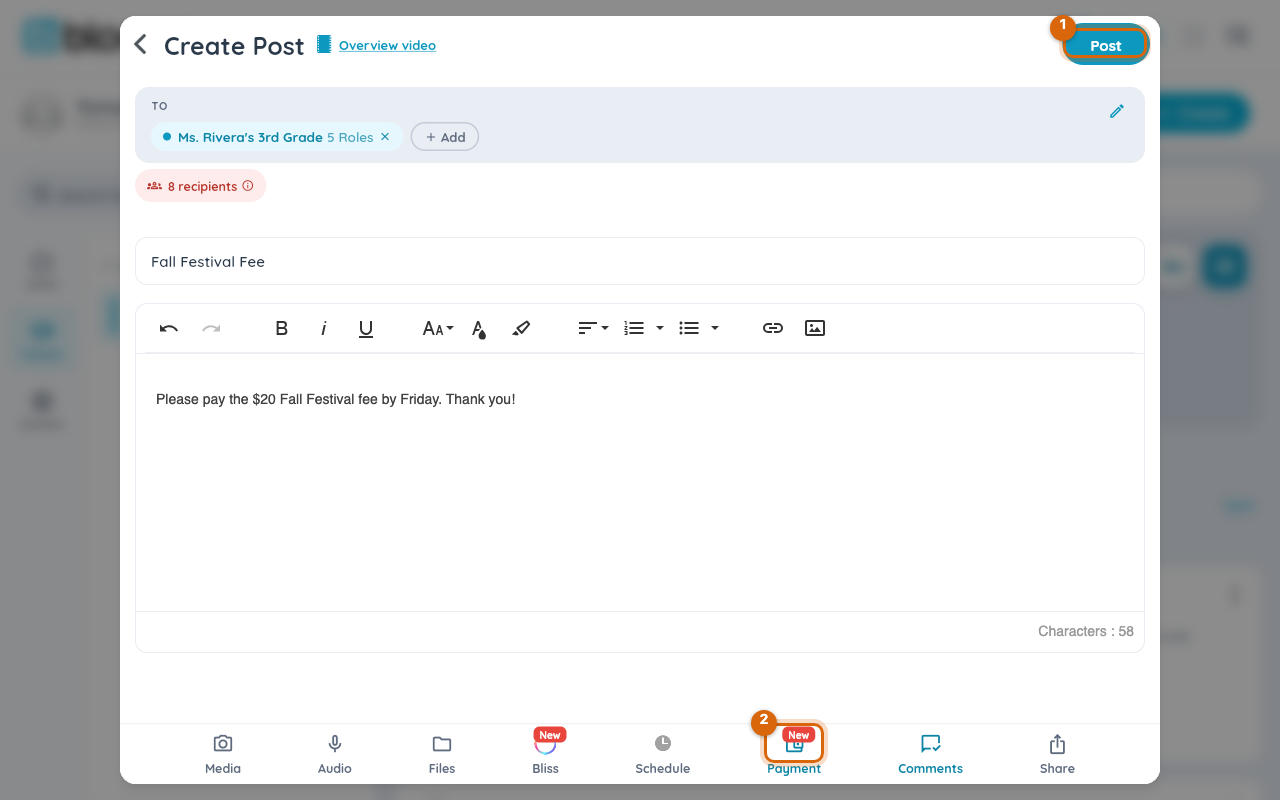
Step 5 — See it tracked in Payments
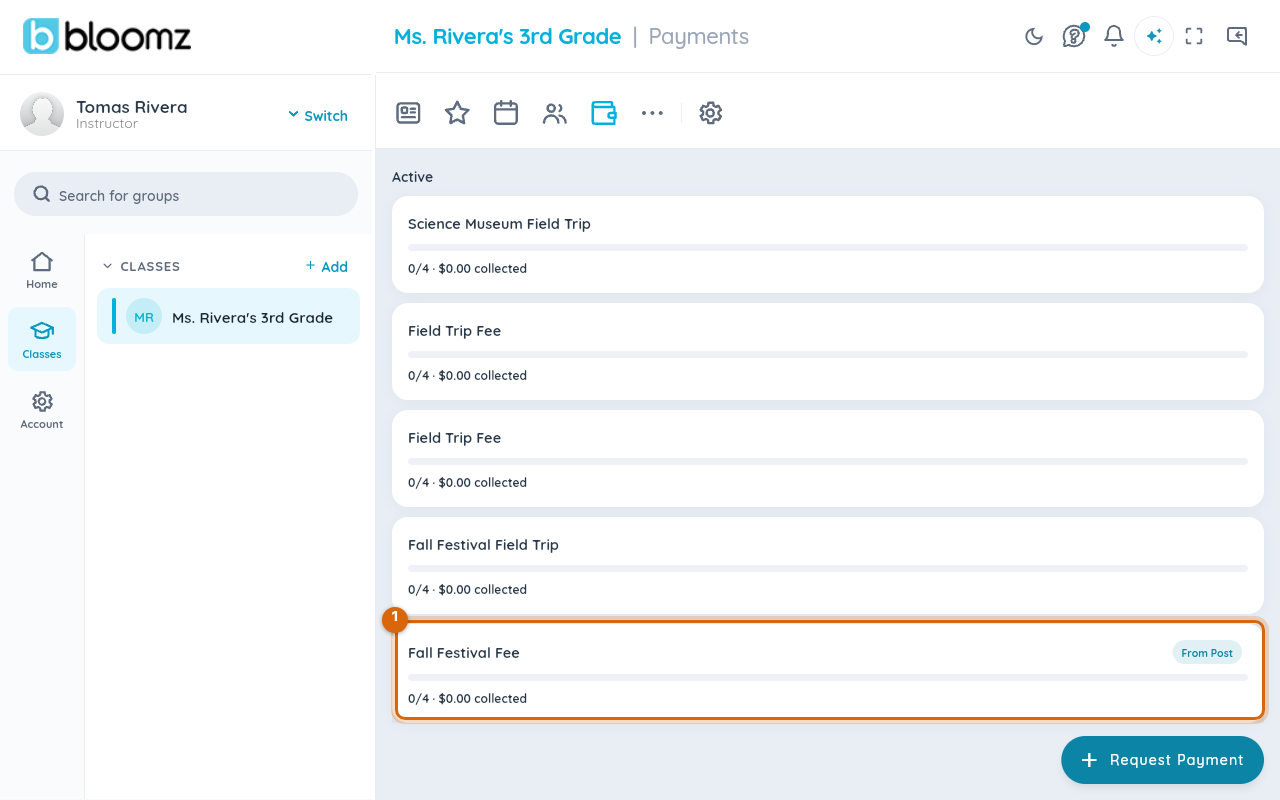
Families are notified and the fee appears in their own Payments area, while the request shows up in your class Payments panel with a From Post chip and a running paid count so you can track who's paid.
Related
- Attach a payment to an event
- Send a form with a fee attached
- Collect payments from families
- Create a post