 Bloomz
Send a form with a fee attached
Some forms shouldn't go through until they're paid for — a permission slip with a fee, for example. Attach a fee when you send the form, then turn on Payment required to submit and Bloomz holds each family's submission until their payment is in.
Before you start
- Payments must be turned on for your school.
- The fee and the switch are chosen when you send the form, not when you create it — you can send the same form to different groups with different payment settings, or none.
Step 1 — Open the form to send it
From your forms list, select the form and choose Send Form.
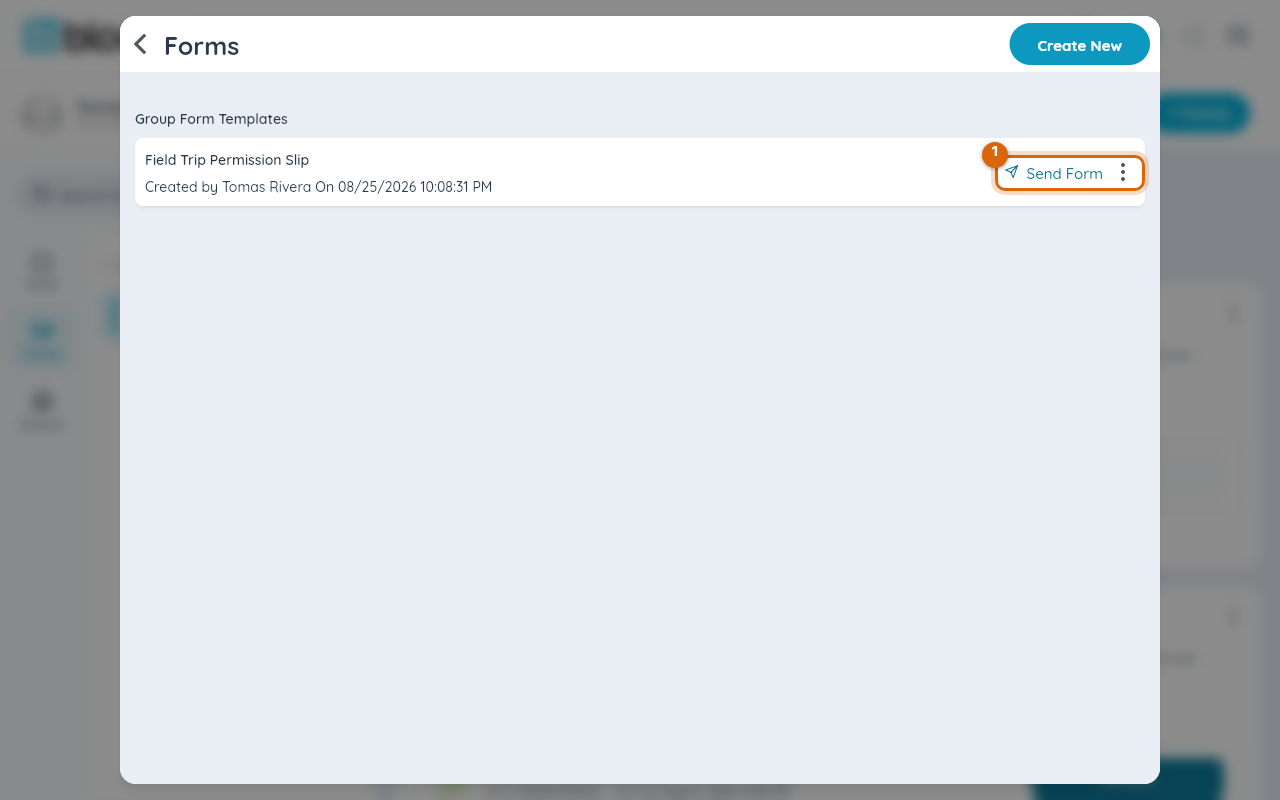
Step 2 — Add the payment
On the Send Form screen, open the Payment row and add a title and a per-student amount — the same payment sheet posts and events use.
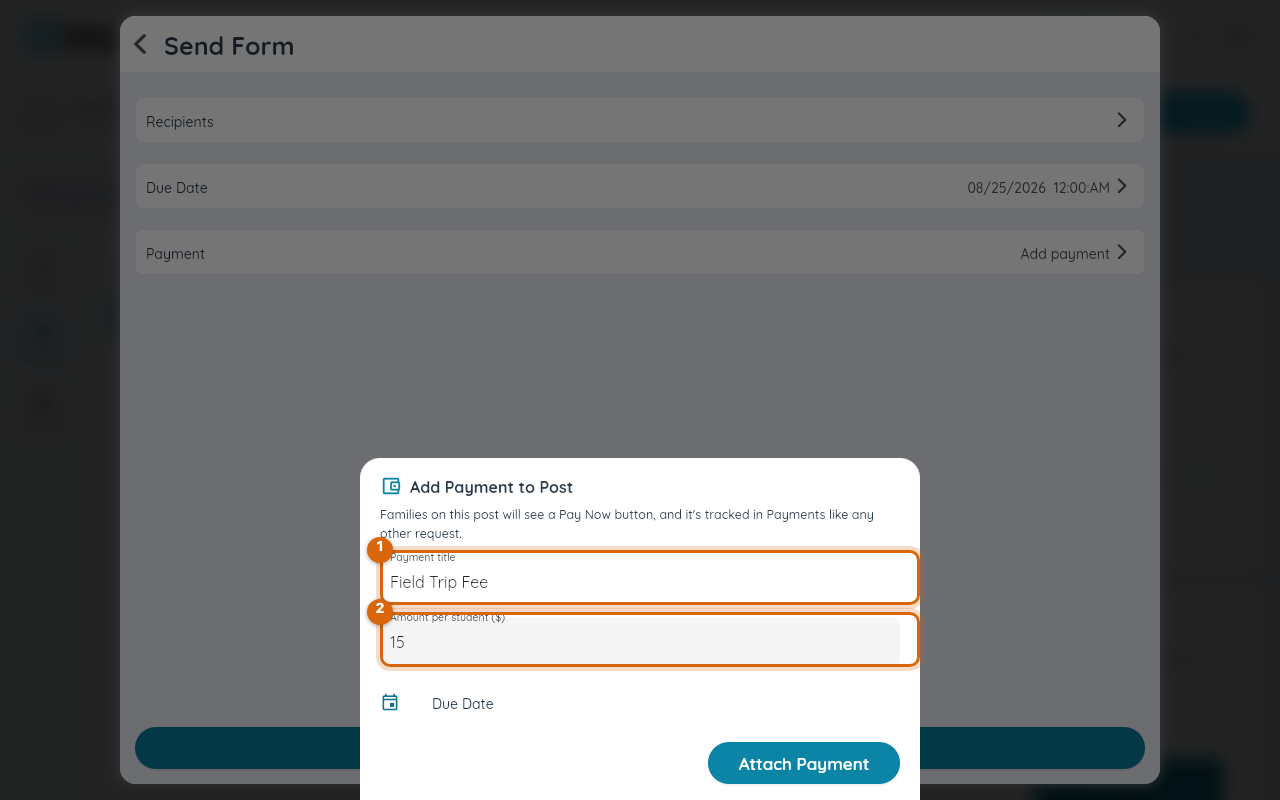
Step 3 — Turn on Payment required to submit
Once the payment is attached, a Payment required to submit switch appears under the Payment row (off by default). Leave it off and the fee and the form are tracked side by side, with families free to submit and pay independently; turn it on and a family must pay before their submission is accepted.

Step 4 — Send the form
Pick the recipients and save. The fee is published against the recipients you picked and tracked in your class Payments panel as an ordinary request.
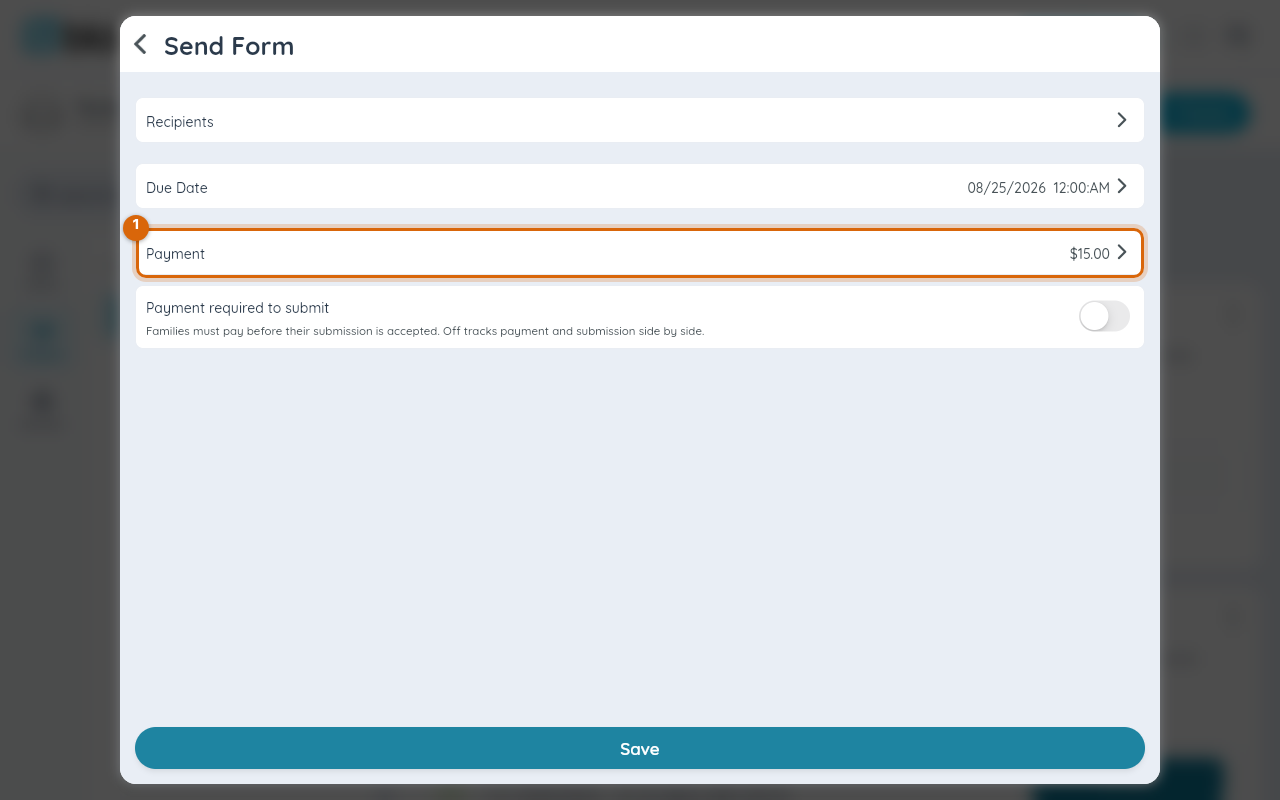
Step 5 — What families see
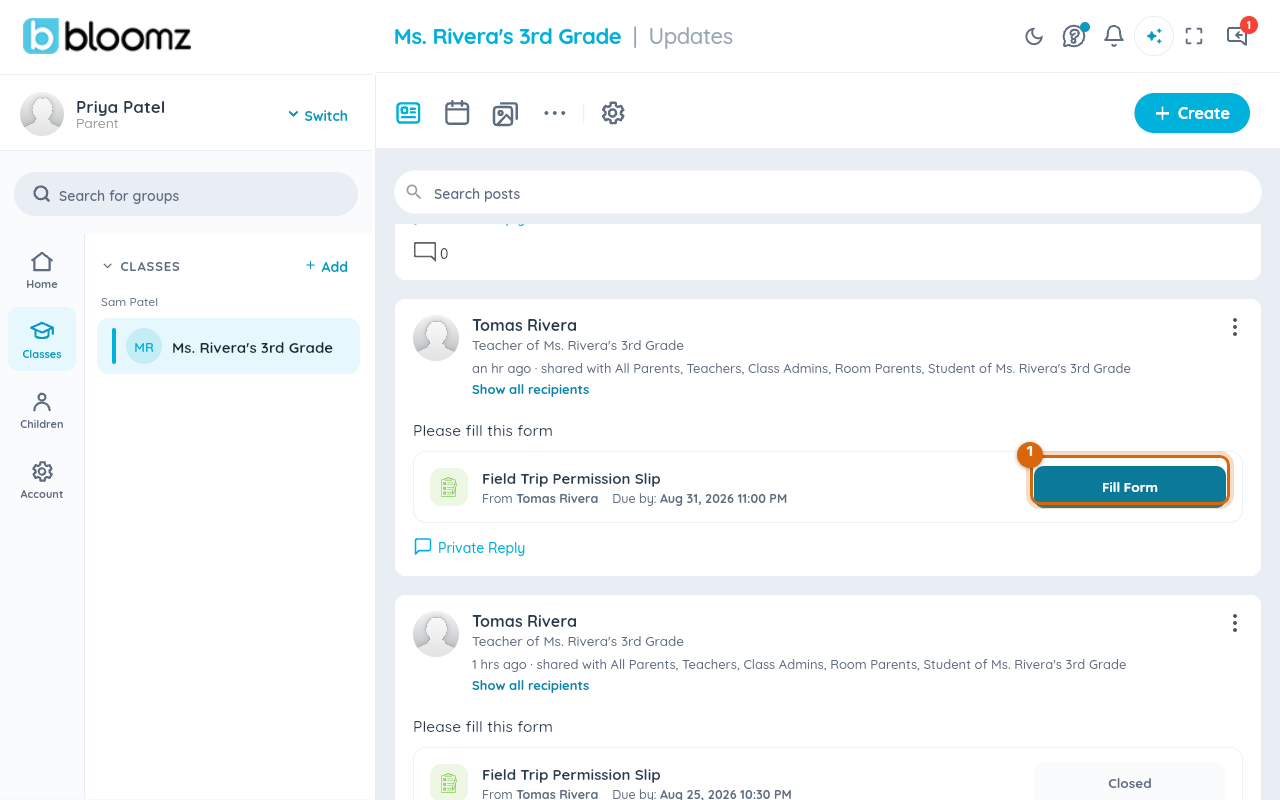
The family gets the form in their feed with a Fill Form button, plus a payment notification, and the fee shows as an open item in their Payments area.
Watch out: with the switch off, the fee doesn't block the form — a family can submit before paying, and pay before submitting. If you need the money before the trip, turn the switch on when you send, or chase the open request from the Payments panel.
Related
- Attach a payment to a post
- Attach a payment to an event
- Send a form to families
- Fill out and submit a form