 Bloomz
Archive classes at the end of the year
At the end of the school year, archive classes you're done with — one at a time or several at once — so they stop appearing as active without deleting their history.
Before you start
You need to be a teacher (for your own class) or a school admin (for any class at your school). Archiving is a straightforward confirm — there's no separate rollover wizard that carries a roster, teacher assignment, or settings forward into a new class.
Step 1 — Open your Classes/Groups list
Open your school (or, as a teacher, your own class list) and select the Manage tab. This lists every class or group at your school.
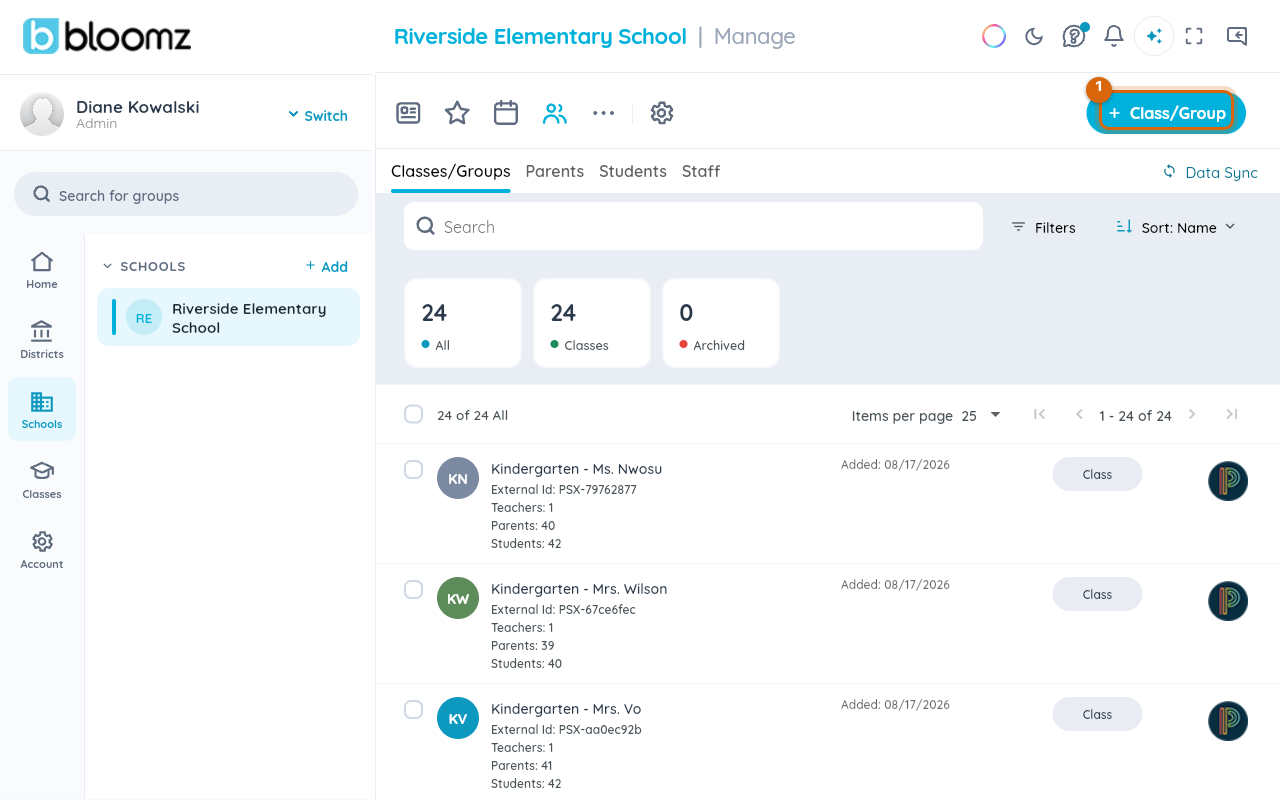
Step 2 — Select the classes to archive
Check the box next to each class you want to archive. Selecting one or more classes reveals the Delete, Join as Admin, Merge, and Archive bulk actions above the list.
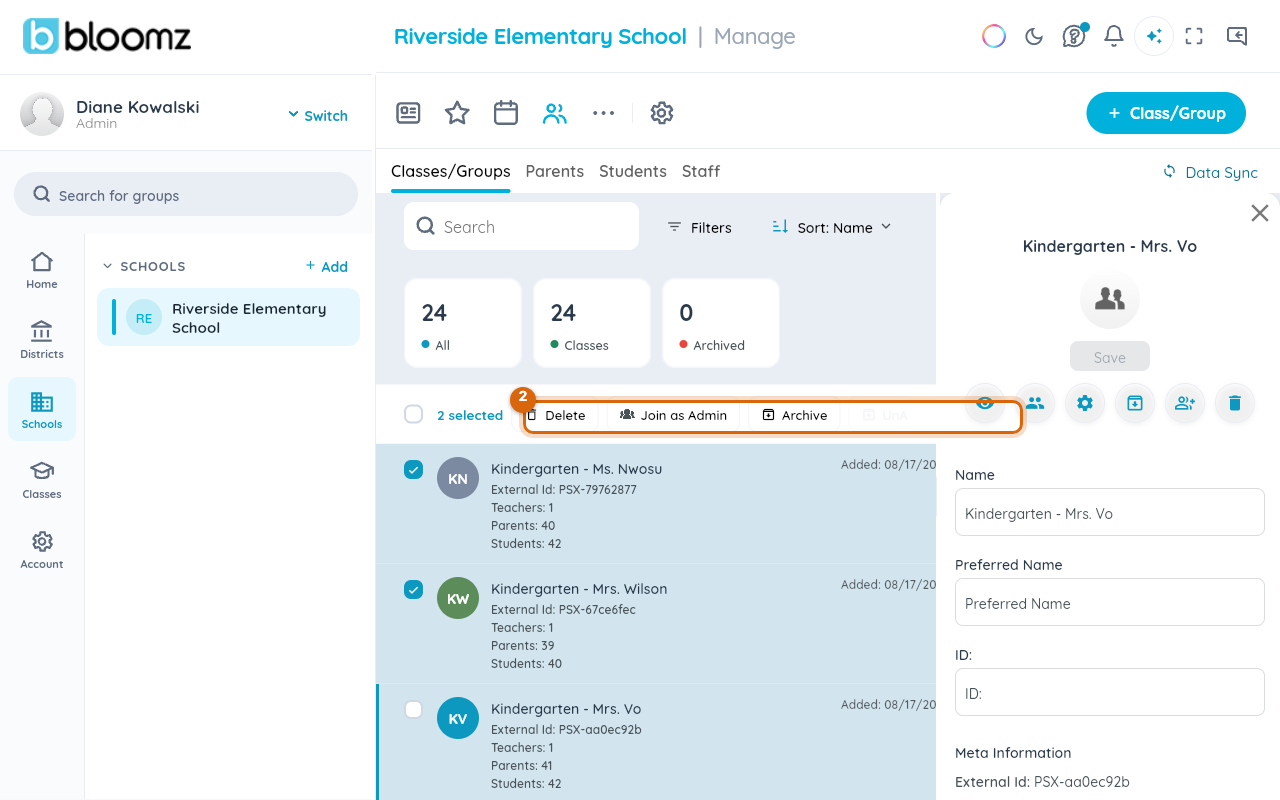
Step 3 — Archive and confirm
Select Archive. A confirmation dialog lists exactly what archiving does — confirm to finish. A single class can also be archived the same way from its own Settings screen.
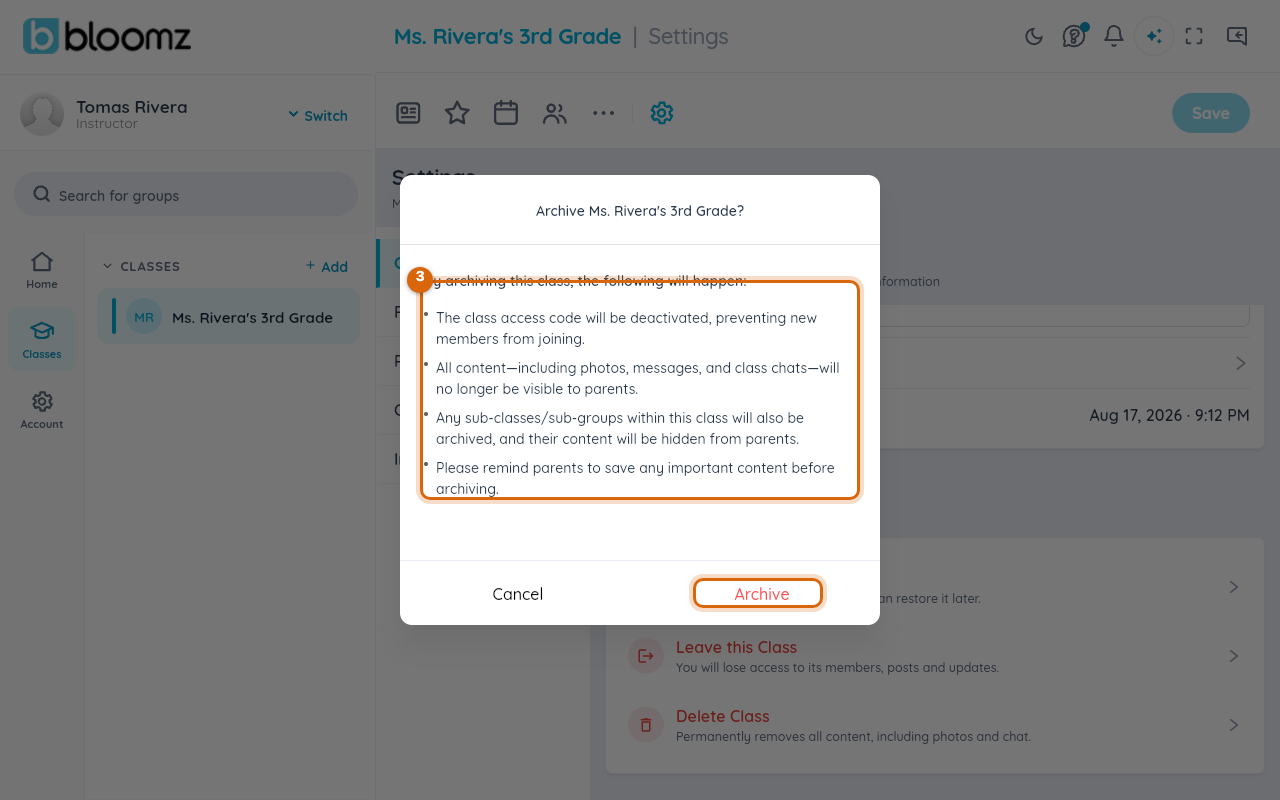
Watch out: archived classes stop accepting new posts or messages immediately, so finish any end-of-year communication before you archive, not after.
What archiving doesn't do
Archiving a class doesn't create a fresh class for the new year, and it doesn't carry the roster, teacher assignment, or settings forward — it only takes the old class out of active use while keeping its history viewable. When you're ready to start the new year, create and roster each new class the same way you set up the old one (see Invite parents and students to a class and Import your roster from a CSV) rather than expecting archiving to build one for you.
Related
- Import your roster from a CSV — the import wizard
- Import students who have no class yet
- Find who's registered and who's still invited