 Bloomz
Organize files and links in your Materials Hub
Keep your school or class's recurring documents and links in one organized, browsable library — a staff handbook, a school calendar link, a substitute guide — instead of buried in old posts. Materials Hub is a folder tree any member can browse; only staff can add to it.
Before you start
Your school or class must have Materials Hub switched on (it is off by default). Anyone who is an accepted member can browse it; adding, editing or reorganizing content needs a teacher, staff or admin role.
Step 1 — Open Materials Hub
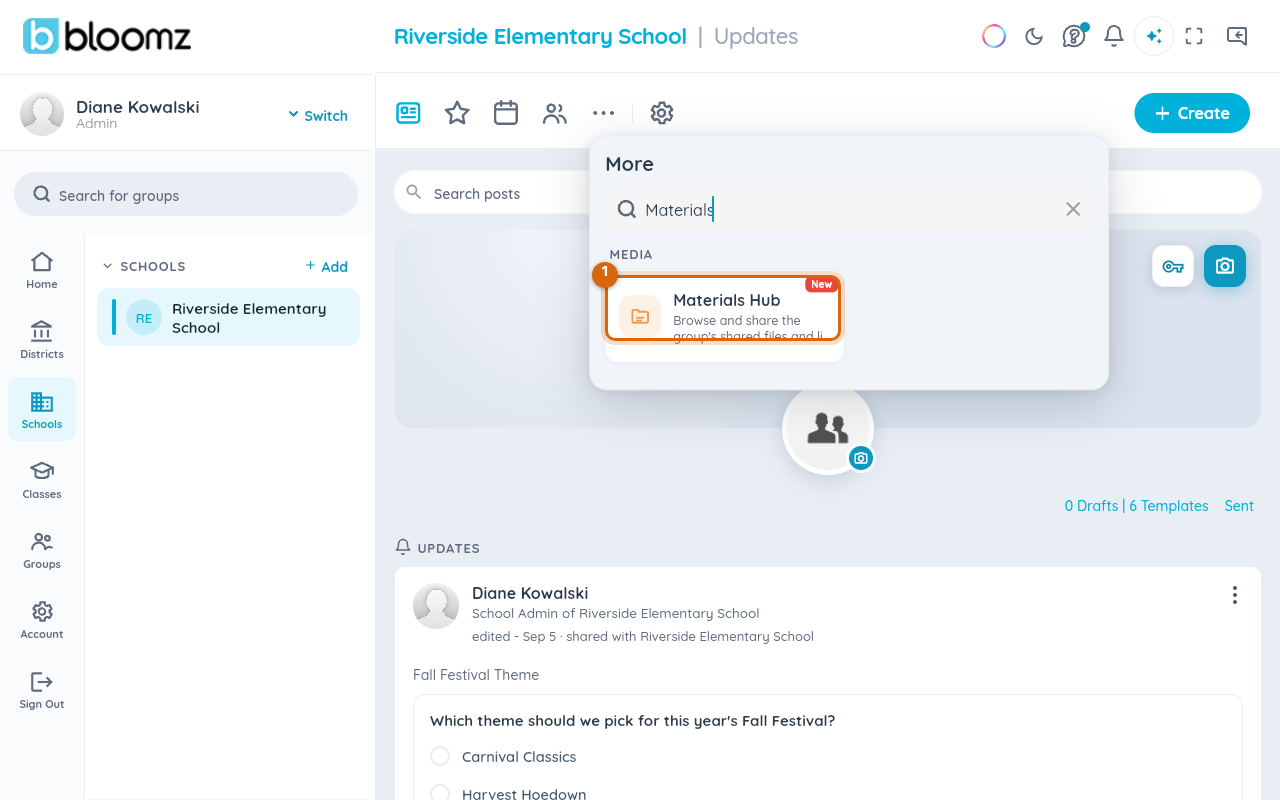
Select More (…), then Materials Hub under Media.
Step 2 — Browse or filter
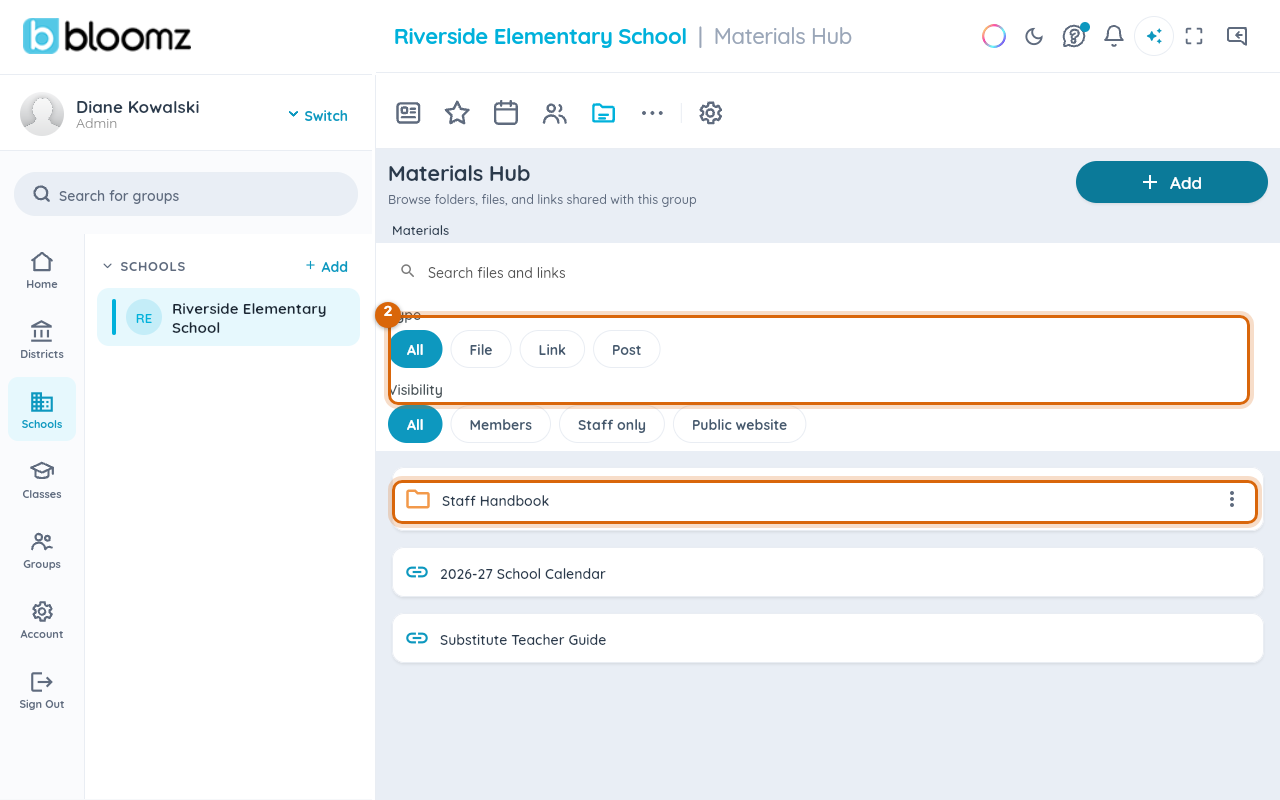
The root view lists every folder, file, link and post shared with the group. Narrow it with the Type chips (File, Link, Post) or the Visibility chips (Members, Staff only, Public website), or search by name.
Step 3 — Open a folder
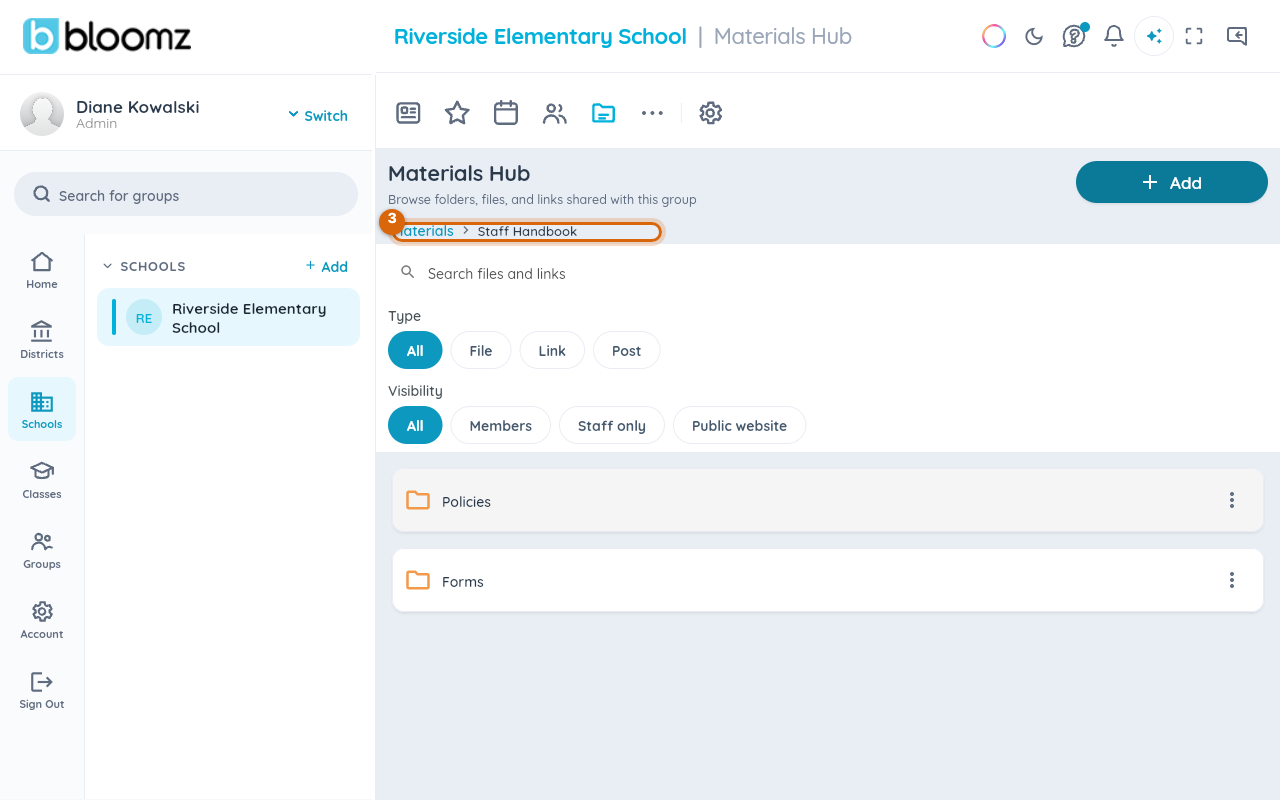
Select a folder to see what's inside it. The breadcrumb at the top always shows where you are, and folders can nest — this school's Staff Handbook folder holds its own Policies and Forms subfolders.
Step 4 — Add something
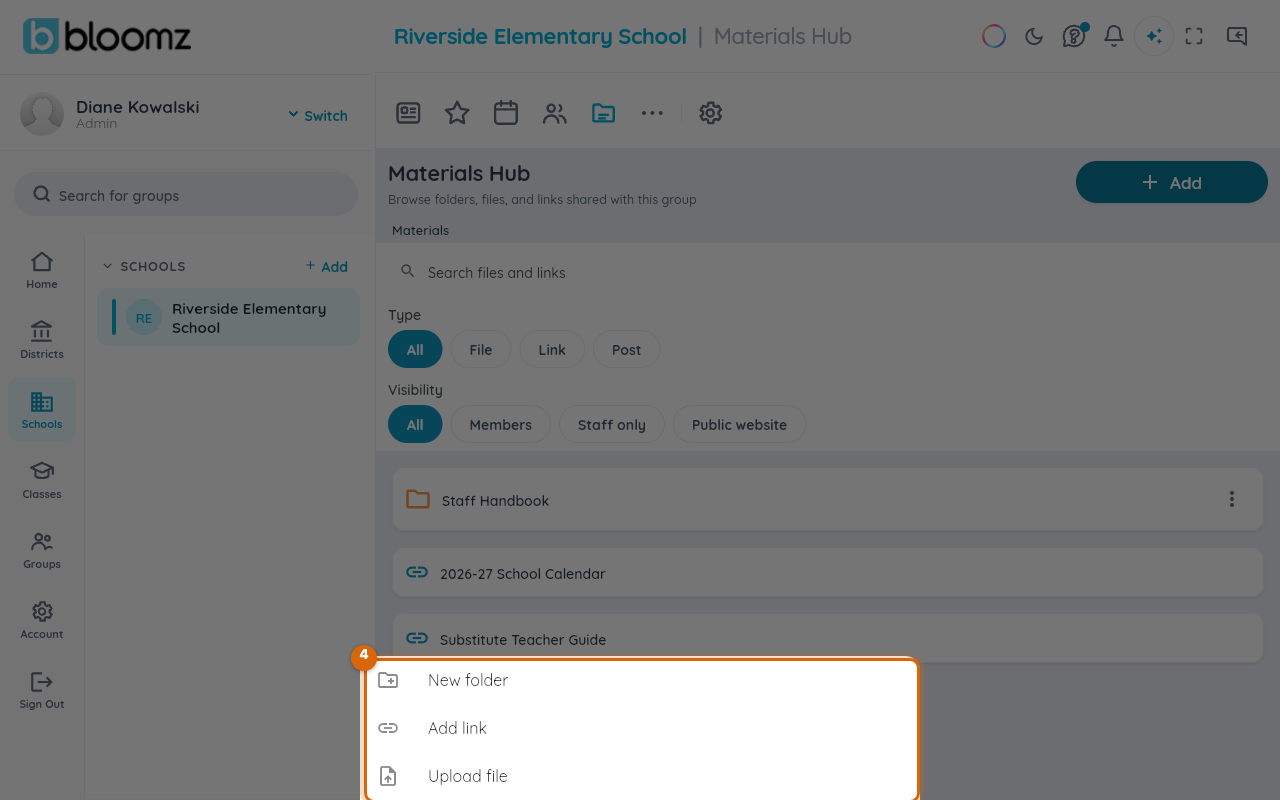
Select + Add to create a New folder, Add link, or Upload file.
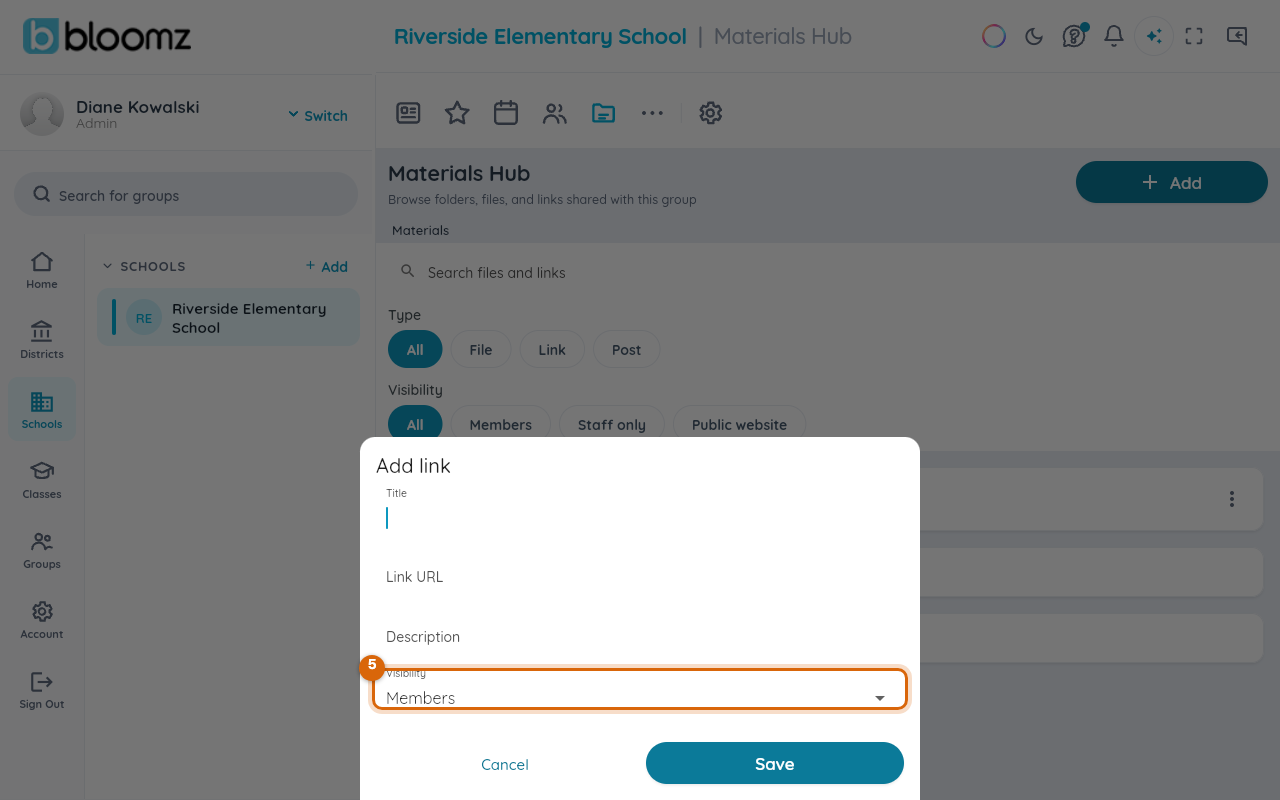
Step 5 — Set who can see it
Every link, file or folder gets its own Visibility: Members (any accepted member of the group, parents and students included), Staff only, or Public website (also eligible for the school's public site once that surface consumes it).
Watch out: a folder's own visibility only controls whether the folder is listed — each file or link inside still enforces its own visibility. A Staff only resource stays hidden from parents even inside a Members-visible folder.
Related
- Share a document with your class
- Download photos and files
- Turn features on or off for a school