 Bloomz
Share a document with your class
Share a permission slip, a study guide, or any other file with your class — families see it in the class Documents library and can open or download it from their phone or computer.
Before you start
Teachers and staff who post to a class can upload documents. Bloomz accepts common file types — PDF, Word, and similar documents work well; very large files may take a moment to upload.
Step 1 — Open Documents
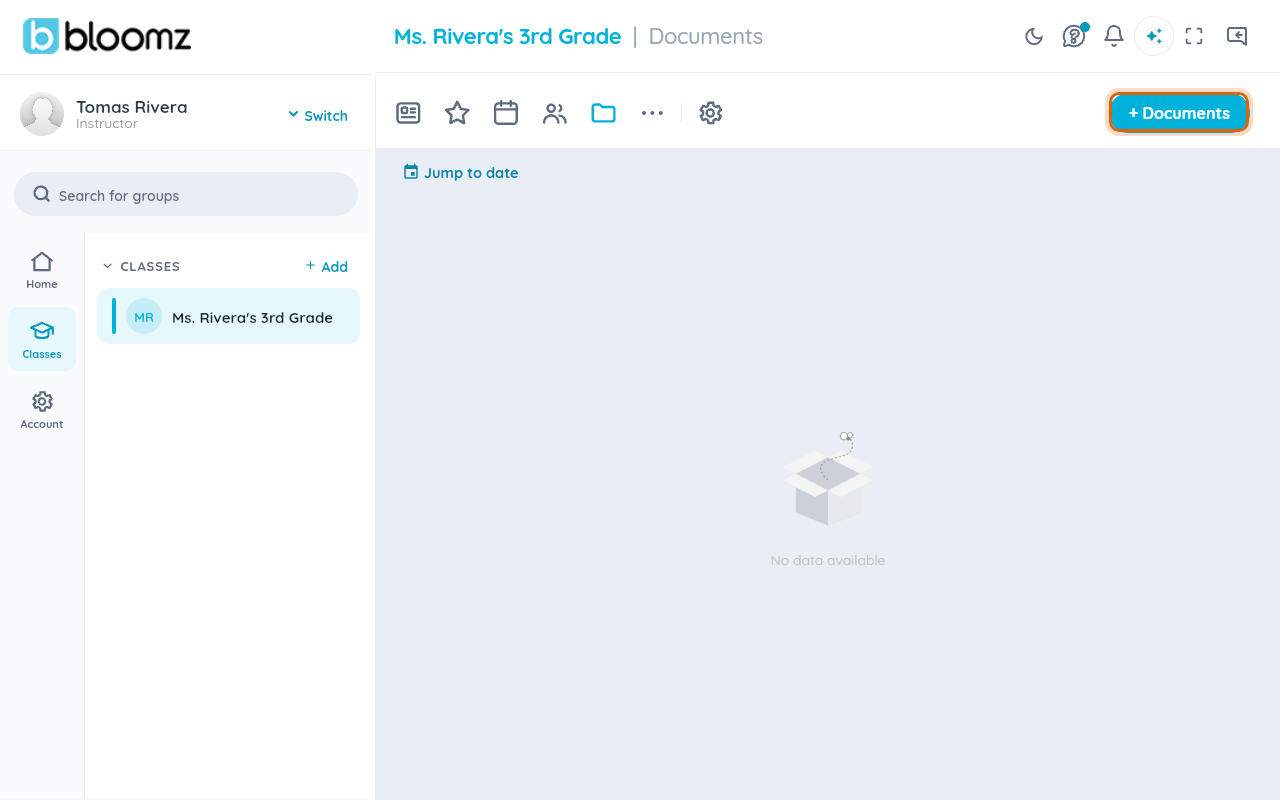
Open your class and select the More (⋯) menu, then Documents under MEDIA. This opens the class's document library — a separate space from Album and Photos.
Step 2 — Start a new upload
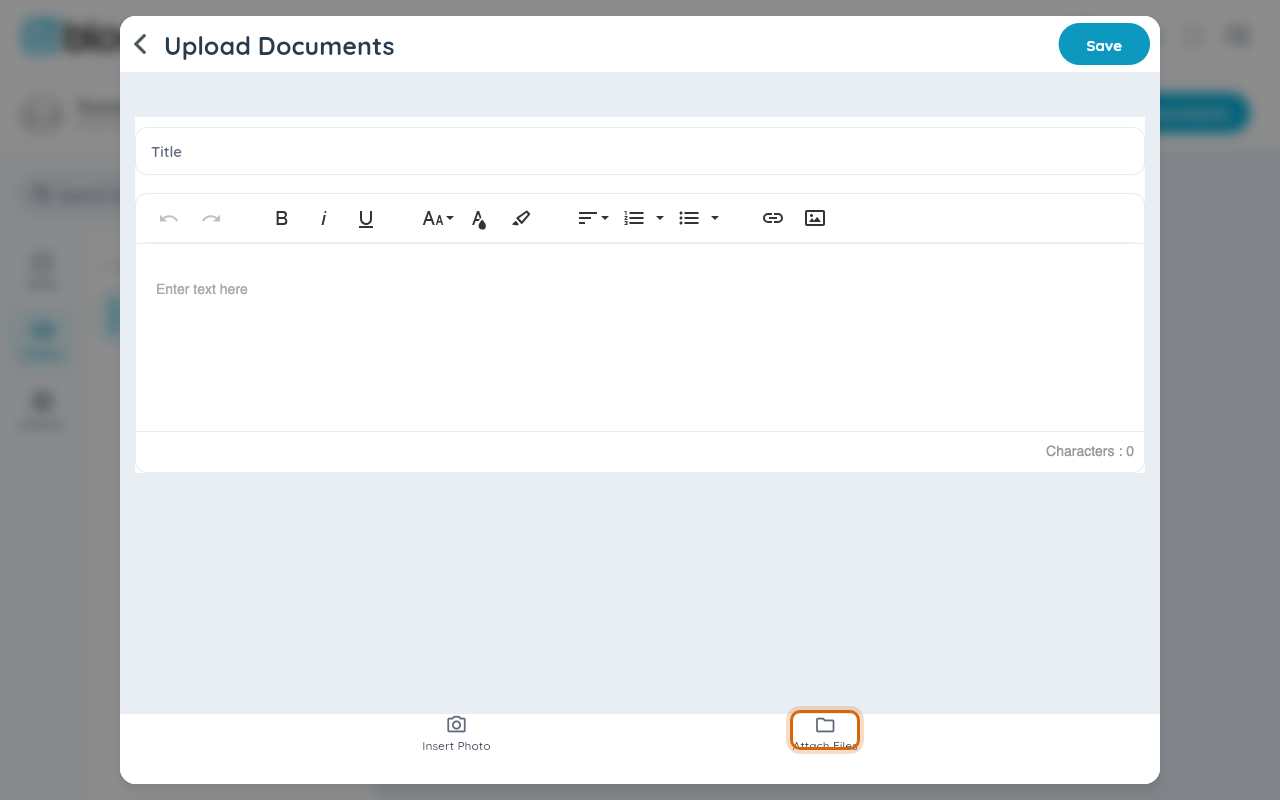
Select + Documents. This opens the Upload Documents screen, with a title field, a description box, and buttons to insert a photo or attach files.
Step 3 — Attach the file and add a title
Give it a title families will recognize, then select Attach Files and choose the file from your device.
Step 4 — Save it
Select Save to add it to the class's Documents library.

Watch out: everyone with access to the class can see documents in the library — double-check you've attached the right file before sharing anything with personal information in it.
What families see
The document appears in the class's Documents library, with its title and file type. Families can open it to view or download it there.
Related
- Upload photos to an album
- Download photos and files
- Message your family
- Post an announcement that stays at the top