 Bloomz
Upload photos to an album
Add photos from your phone or computer to a class album so families can see what's happening — a quick candid from morning circle, or a whole afternoon's worth of shots from a field trip.
Before you start
Teachers and staff who post to a class can create albums and add photos to them. Have your photos ready on the device you're uploading from — camera roll, a folder on your computer, or a shared drive all work.
Step 1 — Find Album
Open your class and select the More (⋯) menu, then look under MEDIA. Albums live under Album — a separate card from Photos (a read-only library of every photo posted to the class) and Documents.
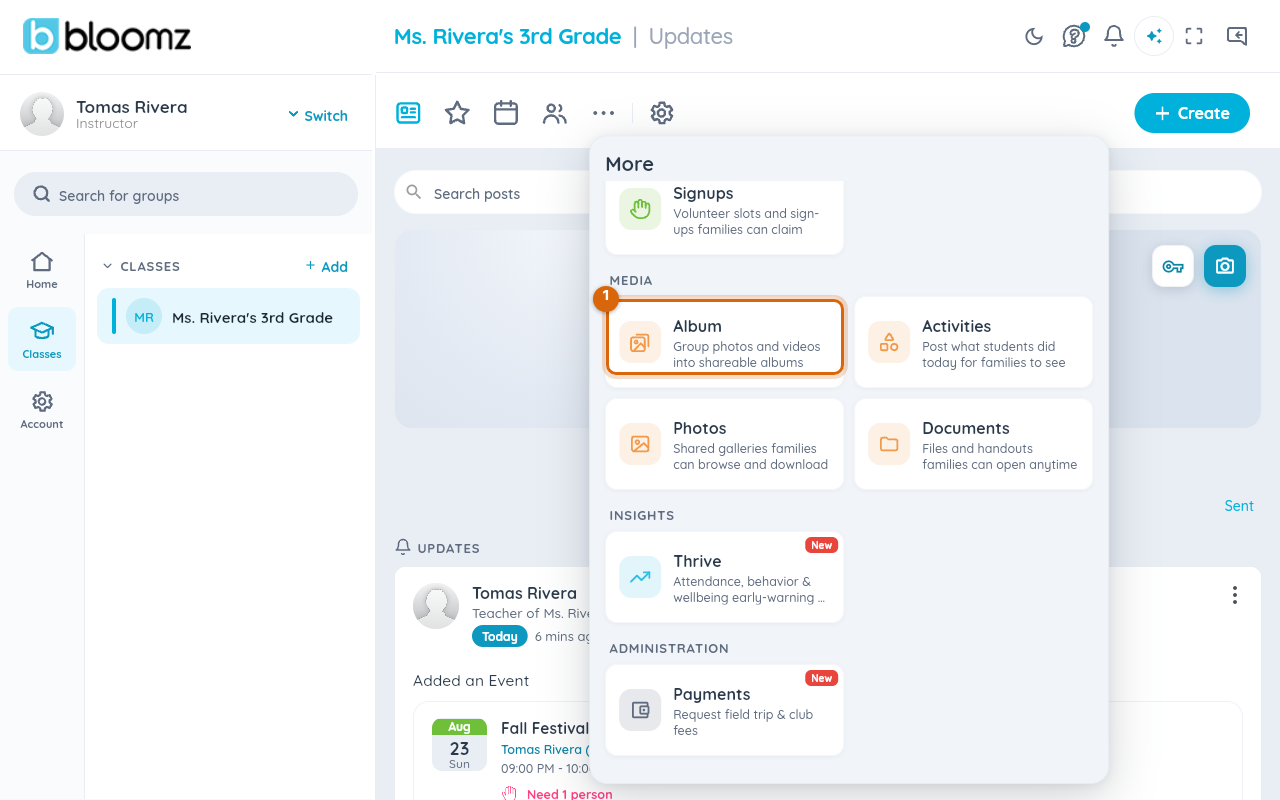
Step 2 — Create an album
On the Album tab, select + Media, then Create Album. Give it a title families will recognize — "Field Trip — Sept 12" beats "Album 1" — and choose who it's shared with, then select Create.
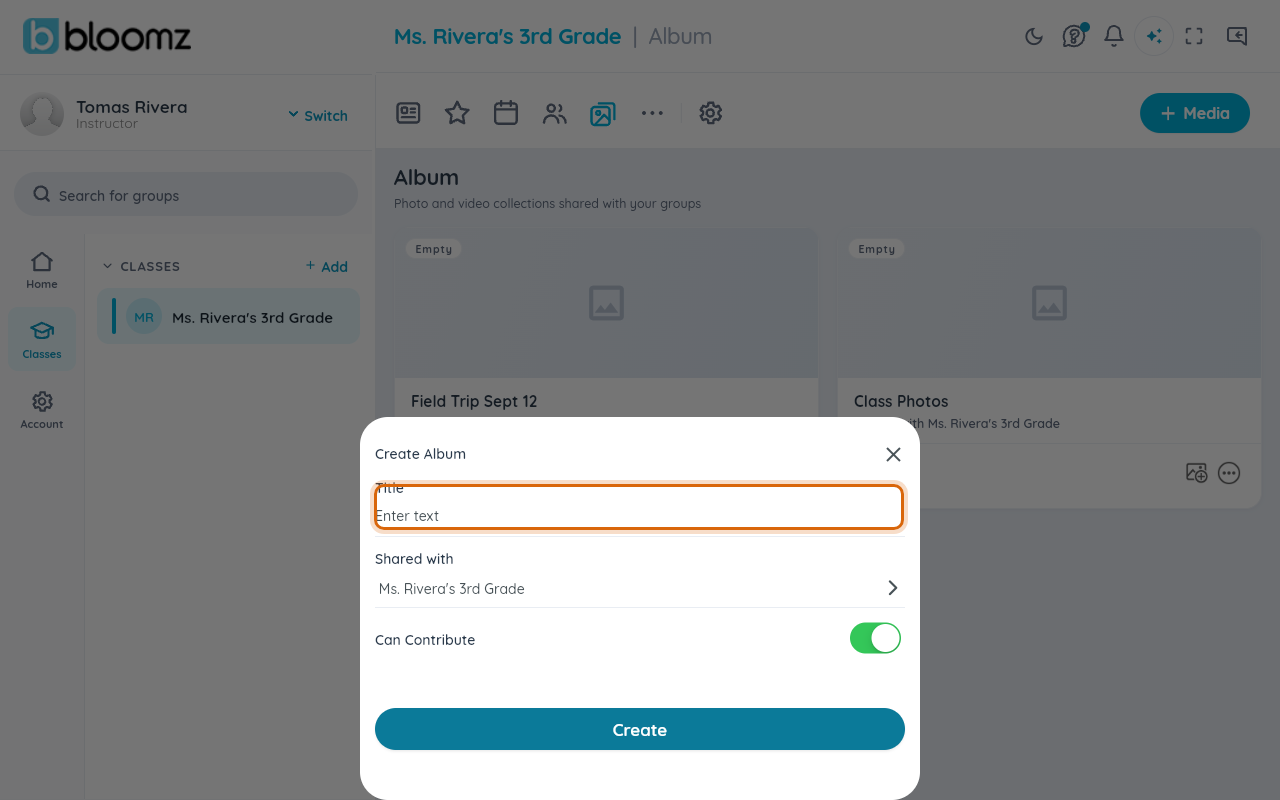
Step 3 — Add photos to it
Select + Media again and choose Add Photos. Pick which album to add to, then your device's photo picker opens — choose one photo or select several at once.
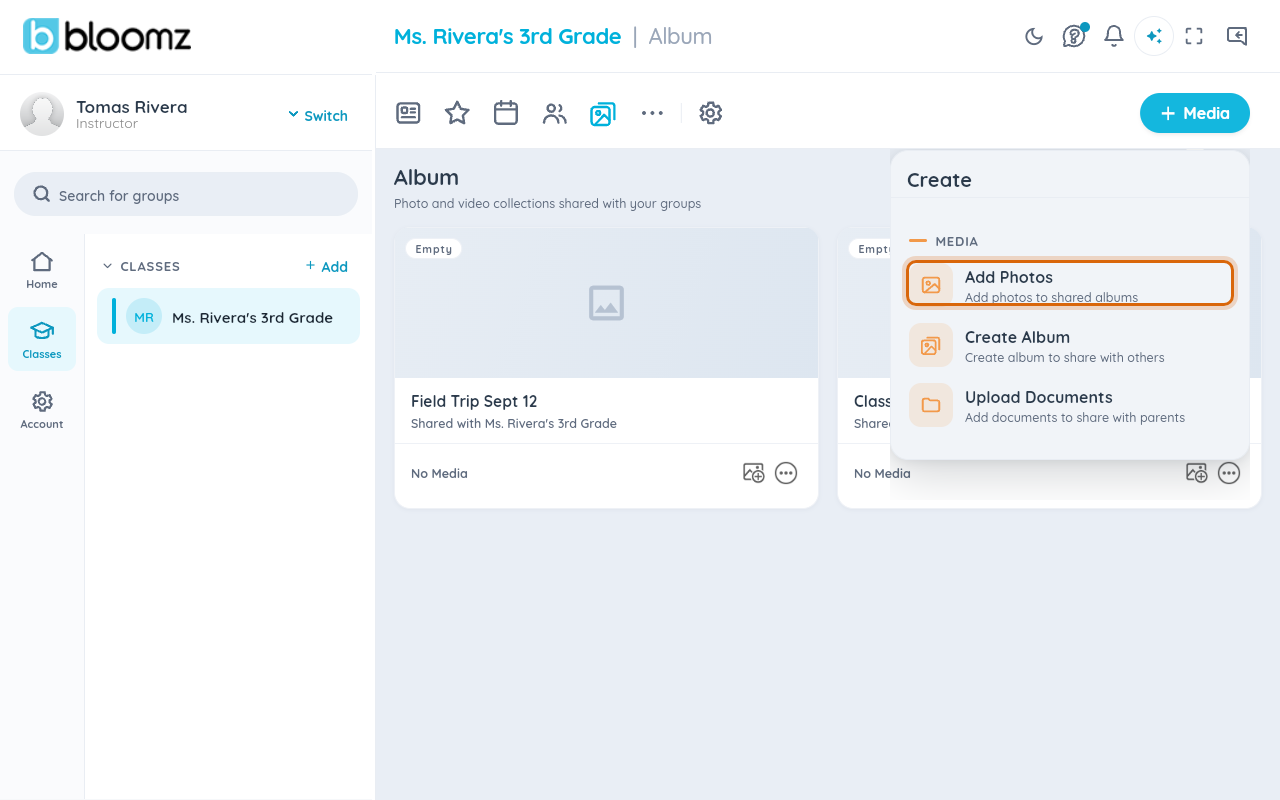
Watch out: large batches take longer on a slow connection. Stay on the screen until the upload finishes — leaving mid-upload can drop the photos still in progress.
What families see
New photos show up in the album, and in the class Photos library. Families can open the album, tap through photos, and download the ones they want.
Related
- Reorder photos in an album
- Set and reposition your class cover photo
- Share a document with your class
- Post an announcement that stays at the top