 Bloomz
Schedule a post for later
Write a post now, send it later. Turning on Schedule lets you pick a future date and time, and Bloomz sends the post automatically the moment it arrives — you don't need to be online.
Before you start
Scheduling lives inside the normal post composer, so start by writing your post the usual way (see Share an update with your class). It works for regular posts; an announcement's dates control how long it stays pinned rather than when it sends (see Post an announcement that stays at the top).
Step 1 — Turn on Schedule
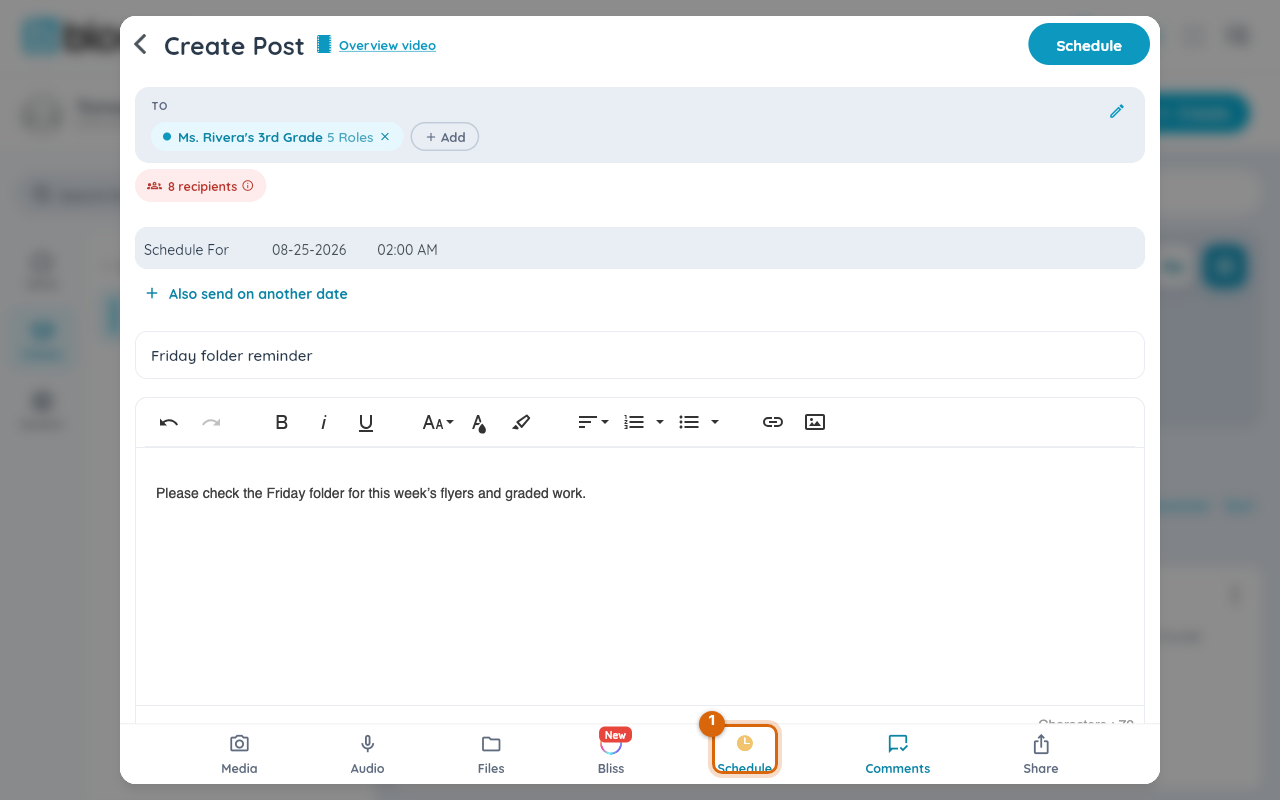
With your title and message written, choose Schedule in the bottom toolbar, alongside Media, Audio and Files.
Step 2 — Pick the date and time
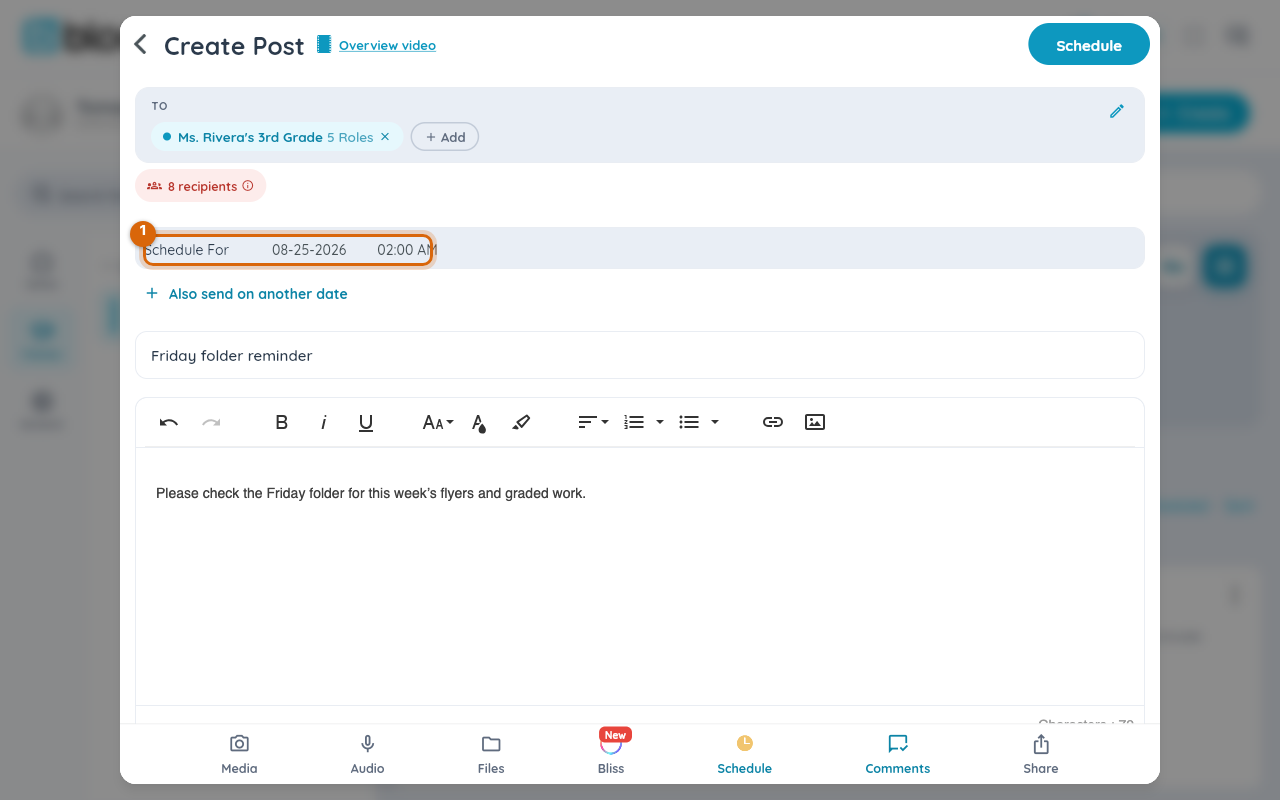
A Schedule For row appears above your message, showing the date and time the post will send. Tap it to change either one.
Step 3 — Finish and send
With Schedule on, the button in the top-right corner reads Schedule instead of Post — tap it the same way you'd send any post.
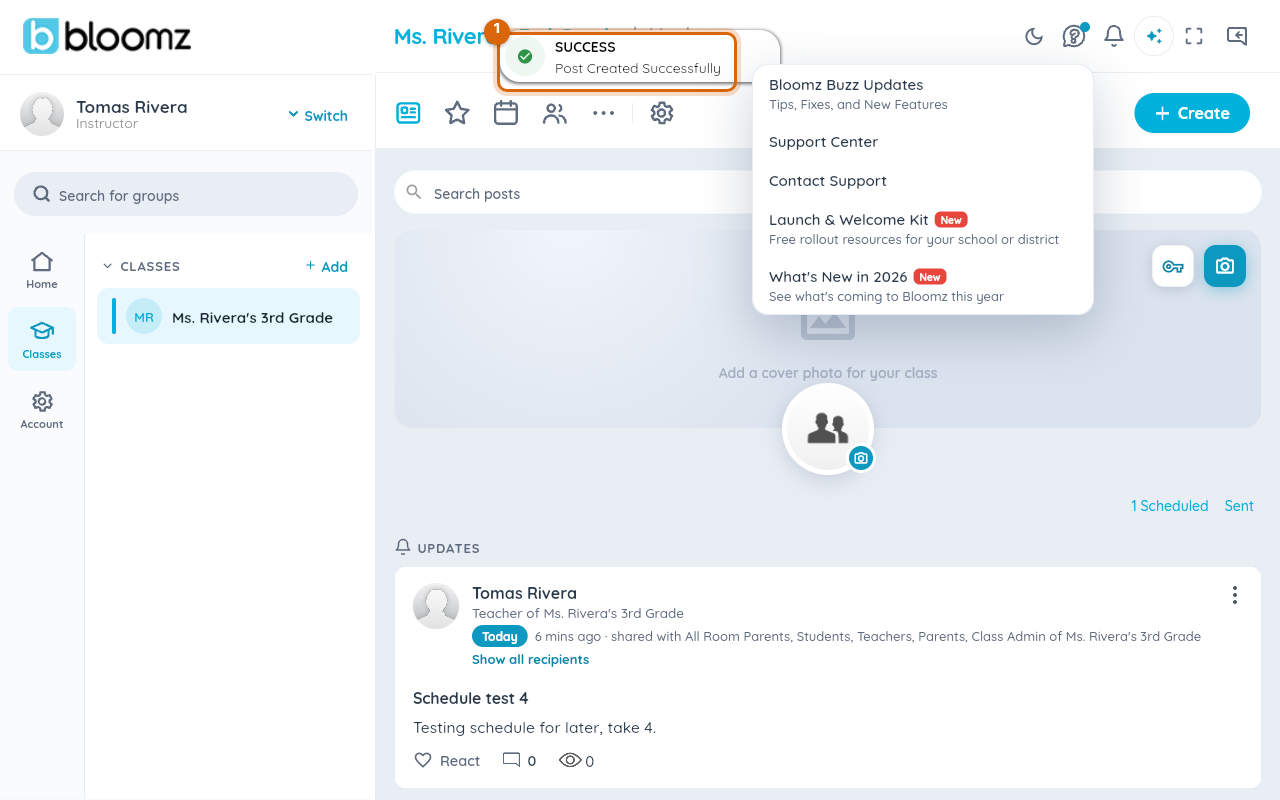
Watch out: the confirmation toast just says the post was created — it doesn't spell out "scheduled" versus "sent." Check the Scheduled Posts list (next step) if you want to be sure it's queued rather than already out.
Step 4 — Find it under Scheduled Posts
Above the feed, a Scheduled link shows how many posts you have queued — tap it to open Scheduled Posts. Each entry shows its send date and time, with Edit and Delete links.
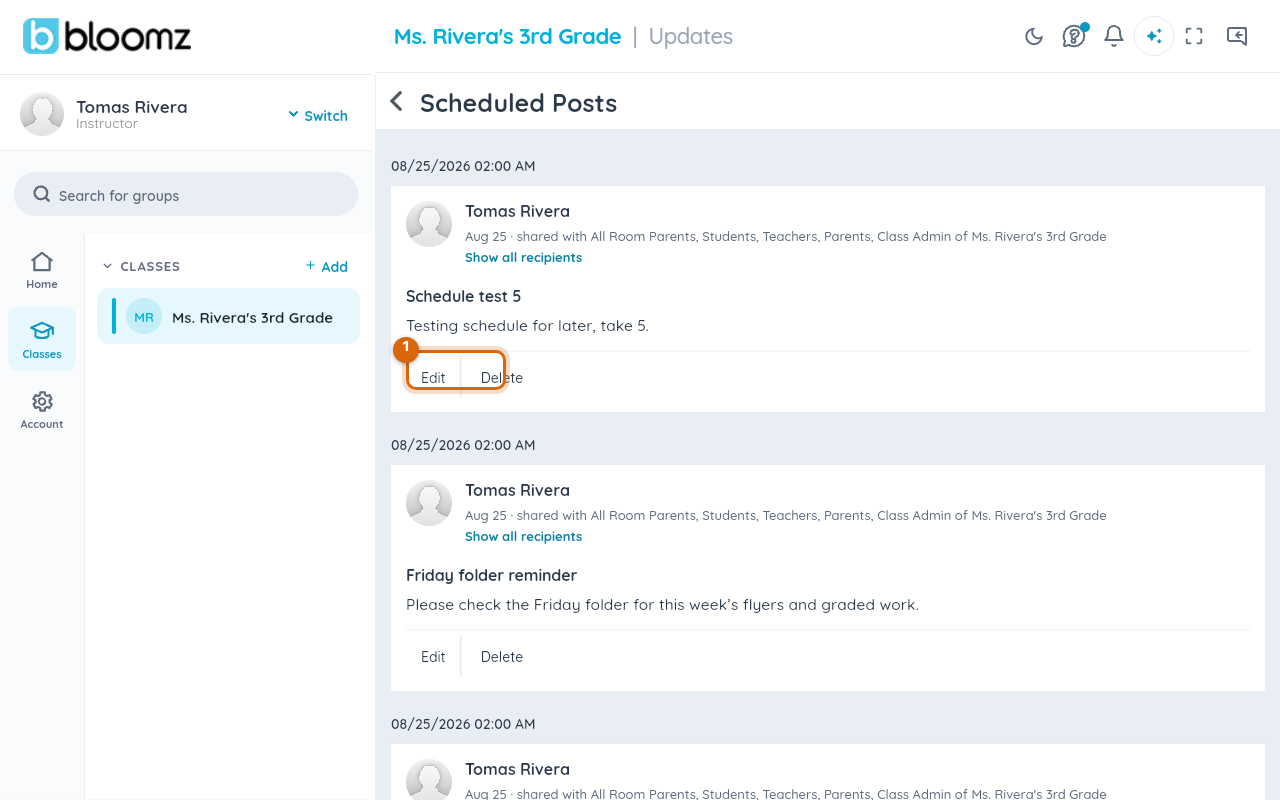
Watch out: a scheduled post is not sitting in a queue you can pause — editing or deleting it on the Scheduled Posts screen is the only way to change what happens; once its time arrives, it sends.
Step 5 — It sends automatically
At the scheduled time, Bloomz sends the post on its own — you don't need the app open or even be signed in. It then moves off the Scheduled Posts list and into your class feed and Sent history, exactly like a post you sent by hand.
Related
- Share an update with your class
- Schedule a post for several dates
- See everything you have sent